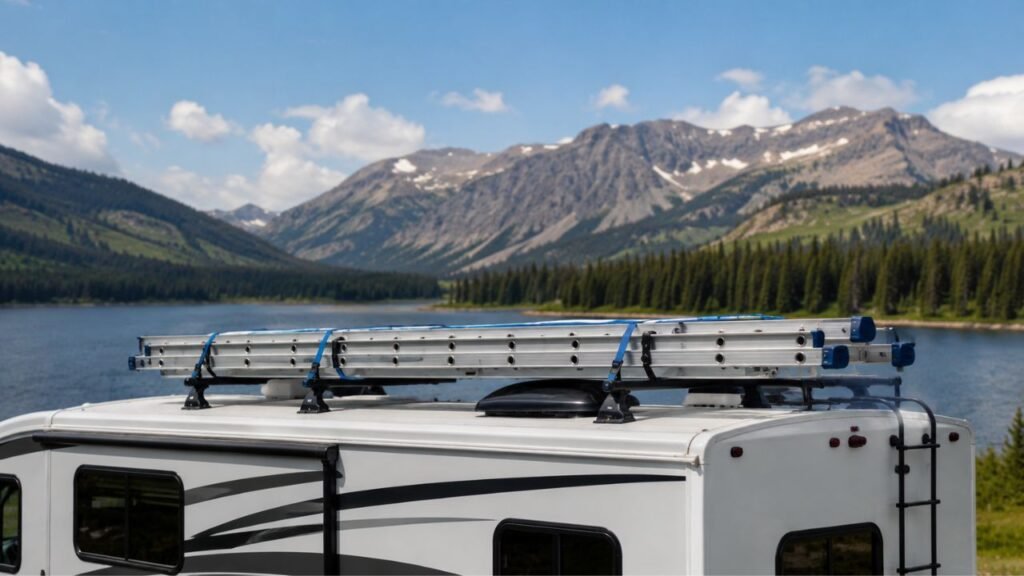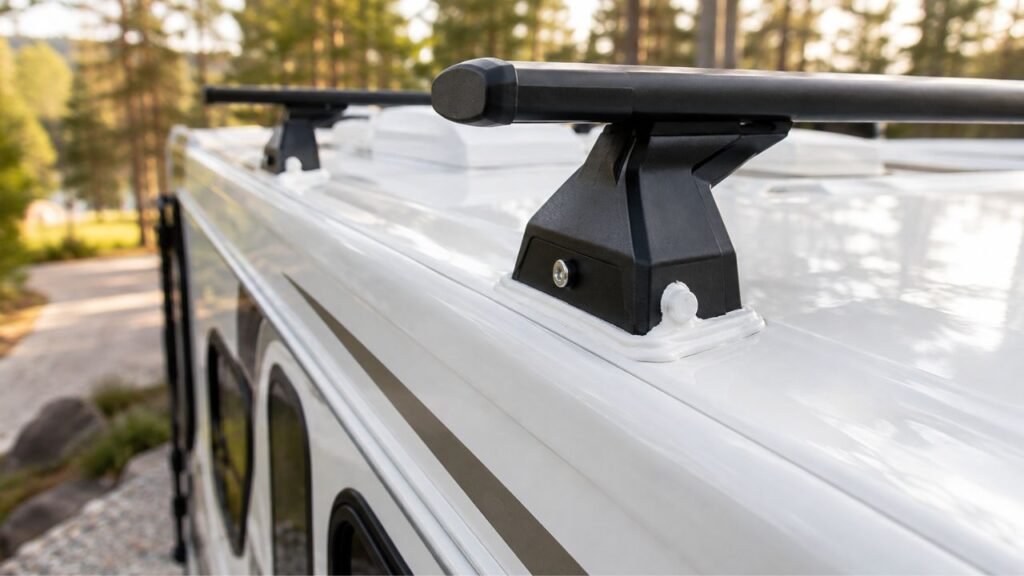
To seal roof-rack mounting holes properly, clean and dry the area first, use a sealant that is compatible with your RV roof, seal beneath the mounting hardware, tighten the fasteners correctly, and protect exposed fastener heads with an approved lap sealant when required. The goal is to stop water before it reaches the hole.
I’ll walk you through the process for factory holes, newly drilled holes, existing mounts, and unused rack holes. I’ll also help you choose the right sealant for EPDM, TPO, fiberglass, PVC, aluminum, and painted metal roofs.
Key Takeaways
- Identify your RV roof material before choosing any sealant.
- Factory holes and newly drilled holes need different preparation.
- The primary waterproof seal should usually sit beneath the mounting hardware.
- Butyl tape, gaskets, or sealing washers can create a compression barrier.
- Newly exposed steel needs corrosion protection before sealing.
- Do not overtighten bolts and squeeze out the entire sealing layer.
- Use compatible lap sealant over fasteners when your roof system requires it.
- Follow the rack and roof manufacturers’ torque and curing instructions.
- Do not rely on sealant alone to close a large abandoned mounting hole.
- Inspect newly sealed mounts again after driving and after heavy rain.
The Proper Way to Seal Roof-Rack Mounting Holes
A reliable roof-rack seal works in layers. You are not simply covering a screw head with caulk and hoping water stays out.
Ideally, water should never reach the opening in the roof.
The first barrier is usually placed beneath the mounting foot, plate, washer, or gasket. That seal is compressed when you tighten the hardware. Sealant may also surround the fastener penetration itself.
Then, depending on your RV roof and rack design, you may add a compatible lap sealant around or over the exposed hardware.
Think of the finished assembly like this:
Roof surface → gasket, butyl, or sealant → mounting foot → sealed fastener → optional top weather seal
That approach protects more possible leak paths.
Water can sneak underneath a mounting plate, move beside a bolt, follow threads, or enter through tiny gaps caused by vibration. That is why sealing only the top of the bolt is often not enough.
First, Determine What Kind of Mounting Hole You Have
Before reaching for a tube of sealant, identify the type of hole you are dealing with. The right repair can change significantly depending on whether the opening is factory-made, newly drilled, already in use, or permanently abandoned.
Factory Threaded Roof-Rack Mounting Hole
Some vans, motorhomes, and tow vehicles come with factory threaded roof mounting points.
These are usually much easier to waterproof because you do not need to drill through the roof yourself.
Remove only the factory plug or cap intended for the rack mounting point. Avoid enlarging the hole or modifying the threaded insert unless the rack instructions specifically require it.
Apply the supplied sealing pad, gasket, washer, or approved sealant according to the mounting instructions.
You may also need sealant around the bolt or underneath the rack foot. The exact arrangement depends on the rack system.
Newly Drilled Mounting Hole
A newly drilled roof hole needs more attention because you have created a completely new water path.
On a painted steel or aluminum roof, drilling may expose bare metal. Clean out all drill shavings first.
Bare steel should receive suitable corrosion protection before you seal the mount. Otherwise, moisture that reaches the cut edge can encourage rust beneath the rack.
Once the surface is protected and dry, install the rack using the appropriate gasket, butyl tape, sealant, and hardware.
Do not drill into an RV roof unless you know where structural backing, wiring, ducts, and roof components are located.
Existing Hole With Rack Hardware Installed
If your roof rack is already installed but leaking, first inspect the existing seal.
Look for cracks, lifted edges, missing sealant, loose hardware, or visible gaps around the mounting foot.
Sometimes the top seal has simply aged. In other cases, water has worked underneath the mounting foot.
If the primary seal beneath the mount has failed, adding another layer of sealant over the bolt head may only hide the problem.
A badly leaking mount often needs to be removed, cleaned, resealed underneath, and reinstalled correctly.
Unused Hole After Removing a Roof Rack
An old roof-rack hole should be closed properly rather than simply filled with a blob of sealant.
For small factory openings, you may be able to use the original waterproof plug or a correctly sized replacement.
Other holes may require a blanking fastener, sealed bolt, roof-system patch, or another permanent mechanical closure.
Seal around that closure using a product compatible with your roof.
For larger openings, damaged holes, or torn roof membranes, a proper patch is safer than relying on sealant alone.
Identify Your RV Roof Material Before Choosing Sealant
Roof sealants are not automatically interchangeable. Before applying anything, confirm whether your RV roof is EPDM, TPO, PVC, fiberglass, aluminum, or painted steel.
EPDM Rubber Roof
EPDM is common on many travel trailers and motorhomes.
Use products specifically approved for EPDM or for your particular roof manufacturer.
A compatible butyl tape or gasket can often create the primary seal underneath the mounting foot. A compatible self-leveling lap sealant can then protect exposed fasteners on horizontal surfaces.
Avoid assuming that every solvent or household sealant is safe for EPDM.
Aggressive cleaners can damage the membrane or interfere with sealant adhesion.
TPO Roof
TPO roofs also require compatible products.
Some popular RV lap sealants are designed to work with TPO, but your roof manufacturer’s instructions should still come first.
Different membrane systems may use different formulations, primers, cleaners, and repair products.
If you do not know which TPO membrane is installed, check your RV documentation before sealing the rack.
PVC Roof
PVC roofing needs a sealant approved for PVC membrane use.
Do not assume that a sealant labeled “waterproof” is automatically safe.
Some household caulks can bond poorly or react differently with flexible roofing materials.
Use a compatible primary seal beneath the mounting hardware, followed by an approved top seal when needed.
Fiberglass Roof
Fiberglass provides a relatively hard mounting surface, but it still needs a watertight penetration.
The mounting foot should sit on a suitable gasket, butyl layer, or compatible flexible sealant.
Clean the surface carefully so wax, oxidation, dirt, or polish does not interfere with adhesion.
Be careful with bolt torque as well. Overtightening can stress fiberglass around the mounting point.
Aluminum or Painted Steel Roof
Metal roofs need two forms of protection: waterproofing and corrosion control.
Check the paint around the mounting point.
If drilling exposes bare steel, treat the cut edge before applying your final sealing system.
Use compatible sealant beneath the mounting hardware and around the penetration.
A rubber sealing washer may also be used when the rack design calls for one.
What Sealant Should You Use for Roof-Rack Mounting Holes?
The best product depends on your roof material and mounting design. Instead of choosing one sealant for every RV, match the product to the surface and the job it needs to perform.
| Roof or mounting situation | Primary sealing approach | Secondary seal | What to watch for |
| EPDM roof | Compatible butyl tape, gasket, or sealant | EPDM-compatible lap sealant | Verify roof manufacturer compatibility |
| TPO roof | Compatible butyl or mounting gasket | TPO-approved lap sealant | Some roof systems have specific requirements |
| PVC roof | PVC-compatible gasket or sealant | Compatible roof sealant | Avoid unapproved household caulks |
| Fiberglass roof | Butyl, gasket, or flexible sealant | Compatible exterior sealant if needed | Remove wax and surface contamination |
| Painted metal roof | Gasket or flexible sealant around penetration | Exterior roof sealant if required | Treat exposed steel first |
| Factory threaded insert | OEM gasket, pad, or sealant | Fastener seal if instructed | Avoid unnecessary drilling |
| Abandoned hole | Plug, sealed bolt, or approved patch | Compatible perimeter seal | Do not depend on sealant alone |
There is no single product that is automatically best for every mounting hole.
The safest approach is to check both the RV roof instructions and the rack manufacturer’s installation requirements.
Butyl Tape, Polyurethane, Lap Sealant, or Silicone: What Does Each One Do?
These products serve different purposes. Knowing what each one actually does makes it much easier to build a reliable seal.
Butyl Tape Creates the Primary Compression Seal
Butyl tape is commonly used beneath roof fixtures, mounting plates, rails, vents, and other RV hardware.
It stays flexible and creates a seal when compressed between two surfaces.
For roof-rack mounts, butyl may sit underneath the mounting foot or plate.
As you tighten the hardware, the butyl spreads and fills small surface gaps.
The important part is not to tighten the mount so aggressively that almost all the butyl gets squeezed out.
You want a continuous sealing layer to remain between the surfaces.
Polyurethane Sealant Creates a Flexible Bond and Seal
Polyurethane products such as Sikaflex-type sealants are popular for vehicle and marine applications because they remain flexible and bond well to many surfaces.
They can be useful around mounting feet, metal penetrations, and hardware.
However, that does not mean you should automatically use polyurethane on every RV roof.
Membrane compatibility matters.
If your RV has an EPDM, TPO, or PVC roof, check that the chosen polyurethane product is approved for contact with that material.
Self-Leveling Lap Sealant Protects Horizontal Fasteners
Self-leveling lap sealant works well around horizontal RV roof penetrations.
After application, it flows slightly and forms a broad weather-resistant layer around screw heads, edges, and fixtures.
It is usually best viewed as a secondary weather barrier.
It should not be treated as the structural material holding your roof rack in place.
The bolts, rack feet, reinforcement, and structural backing should support the rack.
The sealant’s job is keeping water out.
Silicone May Be Appropriate Only When Specified
You may have heard that silicone should never be used on an RV roof.
That statement is too broad.
Some vehicle and rack manufacturers specify silicone for particular mounting systems.
The better rule is simple: use silicone only when the mounting instructions call for it and the product is compatible with the surface.
Do not automatically substitute household bathroom silicone for a roof-system sealant.
Repairs can become difficult if an incompatible silicone leaves residue that prevents future sealants from bonding.
Tools and Materials You May Need
Your exact supplies will depend on the rack and roof material, but these are the most common items.
- Roof-safe cleaner
- Clean lint-free cloths
- Plastic scraper
- Compatible roof sealant
- Butyl tape or mounting gasket
- Rubber or EPDM sealing washers if specified
- Stainless steel or manufacturer-supplied hardware
- Caulking gun
- Correct socket or wrench
- Torque wrench when a torque value is provided
- Corrosion-resistant primer for exposed steel
- Painter’s tape
- Work gloves
- Vacuum for drill shavings
- Waterproof plugs for abandoned mounting holes
Avoid buying products before you know what your roof is made from.
That one step can save you from using a sealant that bonds poorly or damages the roof membrane.
How to Seal RV Roof-Rack Mounting Holes Step by Step
The actual sealing process is straightforward when you work methodically. Focus on surface preparation first, then build the waterproof barrier from underneath the rack mount outward.
1. Check the Rack Mounting Instructions First
Before removing a plug or drilling anything, read the rack instructions.
Confirm where the mounts are supposed to go.
Check the recommended bolt size, mounting pad, backing plate, washer type, sealant, and torque setting.
Also make sure the mounting point can handle the intended rack load.
A perfect seal cannot fix a rack that is attached to an unsupported section of roof.
2. Remove Loose Old Sealant
If you are resealing an old rack mount, remove loose or poorly bonded sealant first.
Use a plastic scraper whenever possible.
Work carefully around rubber or flexible roof membranes.
You do not need to remove solid roofing material just to create a perfectly bare surface.
The goal is to eliminate anything loose, cracked, oily, or poorly attached that would interfere with the new seal.
3. Clean the Mounting Area
Cleanliness is one of the biggest factors affecting sealant adhesion.
Remove dirt, chalky oxidation, grease, wax, adhesive residue, and other contamination.
Use a cleaner approved for the specific roof surface.
Do not automatically use the strongest solvent available.
Some RV membranes are sensitive to harsh petroleum-based products.
The surface should feel clean and residue-free before you continue.
4. Let the Area Dry Completely
Do not rush this step.
Water trapped under a gasket, mounting foot, or sealant layer can cause trouble later.
Check the hole itself, threaded insert, mounting recess, and underside of the rack foot.
Everything should be dry before sealing.
If rain is expected before the sealant can reach its required water-ready time, postpone the job.
5. Protect Bare Metal Around Newly Drilled Holes
If you drilled through painted steel, inspect the exposed edge.
Remove all metal shavings.
A small vacuum is useful because drill swarf can hold moisture and encourage corrosion.
Apply the appropriate corrosion protection to the exposed steel.
Let it dry according to the product instructions before moving forward.
Skipping this step can leave rust developing where you cannot easily see it.
6. Apply the Primary Seal Around the Penetration
Now create the main waterproof barrier.
Depending on the mounting system, this may involve:
- Butyl tape under the mounting foot
- A rubber or EPDM gasket
- A manufacturer-supplied sealing pad
- Compatible polyurethane sealant
- Sealant around the actual bolt penetration
Make sure the seal fully surrounds the hole.
The goal is to stop water at the outer edge of the mounting assembly before it reaches the roof opening.
7. Install the Mounting Foot and Hardware
Position the rack foot carefully without dragging it across the sealant.
Insert the bolts or screws according to the rack instructions.
Tighten them evenly.
You may see a small amount of butyl or sealant squeeze out around the edges. That usually indicates that the sealing layer is compressing.
Do not assume tighter is always better.
Use the specified torque when one is provided.
8. Remove Excess Sealant Carefully
Clean up excessive squeeze-out, but do not dig sealant out of the joint.
You want a continuous sealing edge.
A plastic tool or gloved finger may help shape certain non-self-leveling sealants.
Follow the sealant manufacturer’s tooling instructions.
Avoid smearing sealant across a large area of the roof unless necessary.
9. Seal the Fastener Head When Required
On many RV roof installations, a compatible lap sealant can be applied around or over exposed fastener heads.
This creates a secondary weather barrier.
Cover the entire water path rather than placing one tiny drop directly on the screw.
For horizontal membrane roofs, self-leveling sealant can flow naturally around the fastener.
For vertical or sloped areas, a non-sag product may be more appropriate.
10. Allow the Sealant to Cure
Different sealants have different curing times.
Some become rain-resistant within hours while requiring several days for a deeper cure.
Temperature and humidity can also change curing speed.
Read the product label carefully.
Do not drive immediately if the rack installation instructions require the sealant to cure first.
Roof movement and vibration can disturb fresh sealant.
How Tight Should Roof-Rack Mounting Bolts Be?
Roof-rack mounting bolts should be tightened to the torque specified by the rack or vehicle manufacturer whenever that information is available.
Do not tighten them as hard as possible.
Too little torque can leave the mount loose and create a leak path.
Too much torque can be just as harmful.
Overtightening may squeeze out too much butyl, deform thin sheet metal, damage a threaded insert, crush roof decking, distort a mounting foot, or stress fiberglass.
Tighten the hardware evenly and inspect the sealing material around the mount.
If the rack manufacturer gives a torque value, use a torque wrench rather than guessing.
Should You Use Rubber Washers Around Roof-Rack Bolts?
Rubber, EPDM, or bonded sealing washers can help waterproof roof-rack bolts when the mounting design supports them.
They work by compressing around the fastener and creating another barrier against water.
However, they should not automatically replace the seal underneath the rack foot.
Different washers serve different jobs.
A regular metal washer spreads clamping force.
A fender washer spreads that force across a larger area.
A rubber or bonded sealing washer helps block moisture.
Some mounting systems combine these functions.
Use the washer configuration specified by the rack manufacturer whenever possible.
Why Roof-Rack Mounting Holes Start Leaking
Even a rack that stayed dry for years can eventually develop leaks. Movement, aging sealant, corrosion, and poor installation are common causes.
- Sealant was applied only over the bolt head.
- Dirt or wax prevented proper adhesion.
- The wrong sealant was used on the roof membrane.
- The surface was damp during installation.
- Mounting hardware loosened from road vibration.
- Hardware was overtightened during installation.
- The gasket or mounting pad was omitted.
- Old sealant cracked or lifted.
- Roof flex opened a small gap.
- Rust developed around a drilled steel hole.
- Water traveled through fastener threads.
- Sealant separated from paint or fiberglass.
- A factory plug was missing.
- The primary seal beneath the mounting foot failed.
If you see water inside your RV, do not assume the visible interior drip is directly beneath the hole.
Water can travel along roof framing, insulation, wiring, and ceiling panels before appearing inside.
Common Roof-Rack Hole Sealing Mistakes to Avoid
Several mistakes can make a fresh installation leak surprisingly quickly. These are the ones I would pay the most attention to.
Applying Sealant Only on Top of the Bolt
Covering the bolt head can look waterproof while leaving the real leak path untouched.
Water may already be traveling underneath the mounting foot.
Seal beneath the hardware first whenever the installation design allows it.
Then use the top seal as additional protection.
Using the Wrong Product for the Roof Membrane
A sealant can work perfectly on metal and still be unsuitable for an RV membrane.
Always verify material compatibility.
If your roof manufacturer specifies its own repair products, use those recommendations as the starting point.
Drilling Without Protecting Bare Metal
Freshly drilled steel may look fine today.
Months of hidden moisture exposure can turn that cut edge into a corrosion point.
Clean the drilling debris and treat exposed steel before sealing.
Overtightening the Hardware
More pressure does not always create a better seal.
You can squeeze almost all of the butyl out or distort the roof surface.
That leaves a thinner barrier and can create gaps around the mounting foot.
Sealing Over Moisture or Loose Old Sealant
New sealant needs a stable, clean, dry surface.
Applying it over loose material usually creates another layer that will lift with the old one.
If the old seal is already failing underneath, remove the compromised material first.
Using Sealant as the Rack’s Structural Support
Sealant is for waterproofing.
It should not replace proper bolts, brackets, backing plates, reinforcement, or structural mounting points.
If the rack moves independently of the roof, the mounting system needs attention before you add more sealant.
How to Test Roof-Rack Mounting Holes for Leaks
Once the sealant reaches the manufacturer’s required water-ready or cure time, check the installation rather than simply assuming it is waterproof.
Inspect the Seal Visually
Look closely around each rack foot.
Check for:
- Pinholes
- Cracks
- Gaps
- Lifted edges
- Exposed fastener threads
- Missing sealant
- Loose bolts
- Distorted mounting feet
The seal should look continuous around the water entry points.
Perform a Controlled Water Test
Use a garden hose with gentle flowing water.
Start below the mounting area and work upward gradually.
Do not blast the joint with a pressure washer.
A pressure washer can force water into areas that normal rain would never reach and may damage roof sealant.
Have someone inspect inside the RV while you wet one mounting area at a time.
That makes it easier to identify the exact problem point.
Check Again After Driving
Your rack experiences vibration and aerodynamic loads once you get back on the road.
Inspect the mounts again after your first few trips.
Check that the hardware remains secure and the sealant has not pulled away.
A second inspection after heavy rain is also worthwhile.
How to Reseal an Existing Leaking Roof-Rack Mount
A leaking rack mount does not always need complete removal. The key is figuring out whether the failure is on the surface or underneath the mounting hardware.
When a Surface Touch-Up May Be Enough
A small surface repair may be enough when the mounting foot is solid, the underlying gasket remains intact, and only the top lap seal has developed a small crack.
Clean and dry the damaged area first.
Remove loose material.
Then apply the compatible repair sealant according to its instructions.
When the Mount Needs to Come Off
Remove the rack foot when water appears to be entering underneath it.
Repeatedly adding sealant around the outside will not reliably repair a failed internal seal.
Take the mount off, inspect the hole and surrounding roof, clean the mating surfaces, replace damaged butyl or gaskets, and reinstall the hardware.
This takes more work, but it addresses the actual water path.
When Rust or Roof Damage Must Be Repaired First
Do not seal over serious structural damage.
Rust, cracked fiberglass, enlarged bolt holes, damaged threaded inserts, torn membranes, or soft roof decking need repair before resealing.
If the roof feels soft around the mount, water may have already reached the decking.
That is a good point to involve an RV technician.
How to Seal Roof-Rack Holes After Removing the Rack
If you remove the rack permanently, close every old mounting hole with a durable waterproof system.
Factory mounting points can often be returned to their original configuration using proper plugs or sealed fasteners.
A drilled metal hole may be closed with an appropriate blanking fastener, plug, or permanent patch.
Membrane roofs may require roof-specific patch material.
Avoid filling a large opening with a thick pile of sealant and calling it finished.
Sealants remain flexible and can shrink, crack, or separate as the roof moves.
A mechanical closure or proper patch gives the repair structure. The sealant then provides the weather barrier.
When You Should Have an RV Technician Repair the Mounting Hole
Most small sealing jobs are manageable for a careful DIY owner, but some roof problems deserve professional inspection.
Consider calling an RV technician if you find:
- Soft or rotten roof decking
- Water inside ceiling insulation
- Extensive rust
- Cracked fiberglass
- Torn roof membrane
- Enlarged screw or bolt holes
- Spinning threaded inserts
- Unknown structural backing
- Significant previous water intrusion
- A mount that moves after tightening
- Hidden wiring near the mounting point
- Uncertainty about your roof material
- Uncertainty about compatible sealants
A roof leak becomes more expensive when water spreads into insulation, wood, ceiling panels, and wall framing.
Repairing the cause early is usually much easier.
Final Words
Sealing roof-rack mounting holes properly is less about using a huge amount of sealant and more about putting the right material in the right place.
Start by identifying the roof and mounting hole. Clean and dry the surface, create a reliable primary seal beneath the hardware, tighten everything correctly, then add a compatible top seal where needed.
If you remember one thing, remember this: the best seal stops water before it reaches the mounting hole.
Your RV roof manufacturer’s instructions, vehicle recommendations, and rack installation manual should always take priority over generic advice.
Related FAQs
Can I Use Dicor to Seal Roof-Rack Mounting Holes?
Yes, Dicor-style lap sealant can be suitable for many horizontal RV roof applications when it is compatible with your roof membrane. It works best as a secondary weather seal around exposed fasteners rather than as the only waterproofing underneath the mounting foot.
Is Sikaflex 221 Good for Roof-Rack Mounting Holes?
Sikaflex 221 can work well for many metal, fiberglass, and vehicle mounting applications because it remains flexible and bonds to numerous surfaces. However, confirm compatibility before using it directly on EPDM, TPO, PVC, or another RV membrane.
Is Butyl Tape Enough to Waterproof a Roof Rack?
Butyl tape can create an excellent primary compression seal beneath a rack foot, plate, or mounting bracket. However, many RV installations also benefit from compatible sealant around exposed fasteners or mounting edges as a secondary weather barrier.
Should Sealant Go Inside the Mounting Hole?
Sealant may be applied around the penetration or fastener depending on the mounting design, but you should not automatically fill a factory threaded insert with sealant. Follow the rack or vehicle instructions so you do not interfere with threads or hardware seating.
Can I Use Silicone Around Roof-Rack Bolts?
Silicone can be appropriate when the rack or vehicle manufacturer specifically recommends it and the product is compatible with the mounting surface. Avoid automatically using household silicone on an RV membrane because future repairs and adhesion can become difficult.
Do Roof-Rack Bolts Need Rubber Washers?
Not every roof-rack bolt needs a rubber washer, but EPDM or bonded sealing washers can improve waterproofing when they are part of the mounting design. Use the washer type recommended for your rack and do not use it as a substitute for the main seal beneath the mounting hardware.
How Do I Seal Old Roof-Rack Holes After Removing the Rack?
Close old mounting holes with a waterproof plug, blanking fastener, or roof-specific patch, then seal the perimeter with a compatible product. Avoid depending on a thick blob of sealant alone, especially for larger or damaged holes.
How Long Should Roof-Rack Sealant Dry Before Rain?
Drying and water-ready times vary widely between polyurethane, silicone, polyether, and RV lap sealants. Check the label for your exact product and consider temperature and humidity before exposing the repair to rain.
Can a Roof Rack Leak Even If the Bolt Head Is Covered With Sealant?
Yes. Water can travel underneath the rack foot, alongside the bolt, through threads, or beneath a failed gasket even when the bolt head looks completely covered. That is why the seal underneath the mounting hardware matters so much.

Jack Collins specializes in RV routes, trail access, and travel logistics. His how-to articles help RV and trailer owners plan smoother trips and avoid common mistakes. Every review focuses on performance, safety, and value.