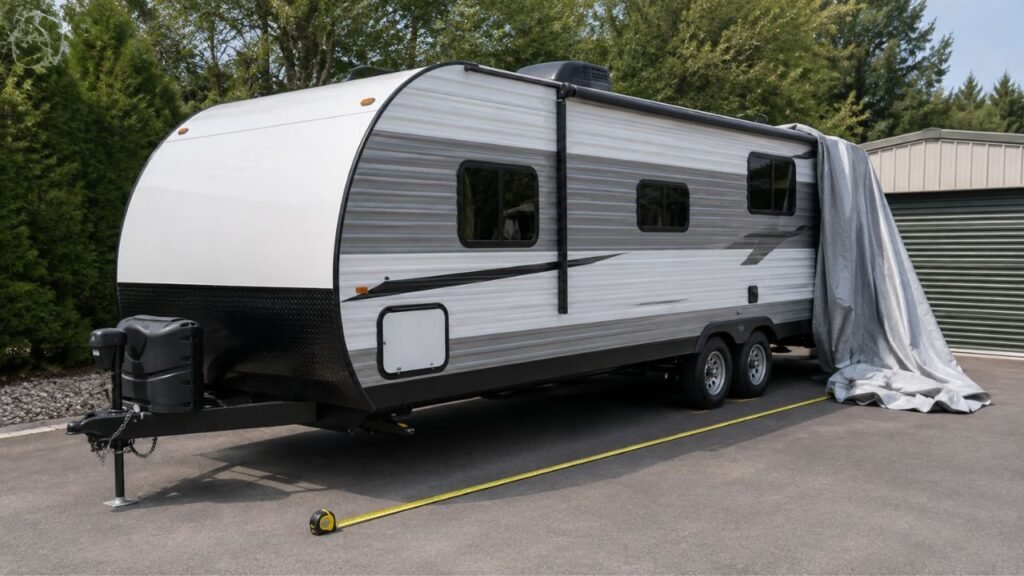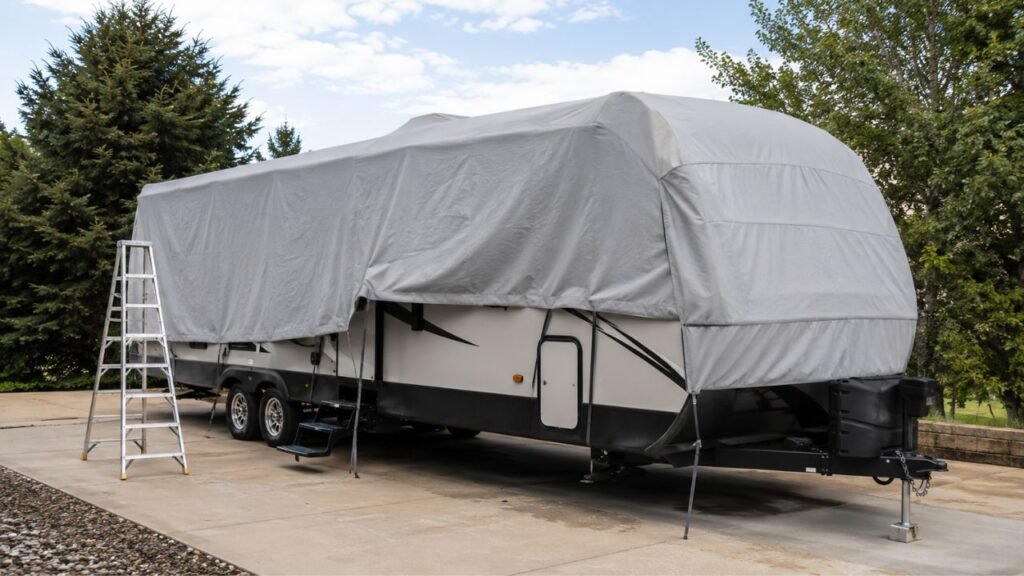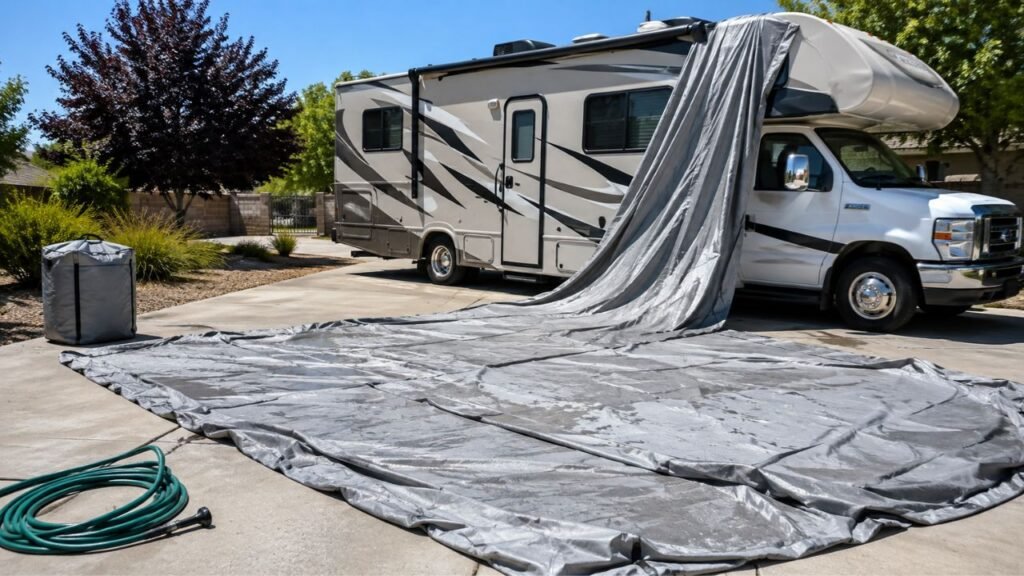
To clean and dry an RV cover before storage, remove loose debris, wash it gently with water and a manufacturer-approved mild cleaner, rinse away all residue, then air-dry both sides completely. Once it is fully dry, inspect the seams, zippers, straps, and fabric before folding or rolling it into a clean storage bag.
The cleaning part is fairly simple. The drying and storage steps require more attention. I’ll walk you through the safest process, including stain removal, drying checks, repairs, folding, and long-term storage.
Key Takeaways
- Check your RV cover’s care label before choosing any cleaner.
- Remove loose leaves, dirt, pollen, and grit before washing.
- Use normal garden-hose pressure instead of aggressive spraying.
- Clean stains gently with a soft cloth, sponge, or approved brush.
- Rinse the cover until no cleaner remains in seams or folds.
- Dry both the outside and inside before folding the cover.
- Inspect tears, zippers, seams, buckles, and straps before storage.
- Store the clean cover somewhere cool, dry, and protected from pests.
What Do You Need to Clean an RV Cover?
You do not need complicated equipment to clean most RV covers. In fact, gentle tools are usually safer because harsh scrubbing and strong chemicals can damage protective coatings.
Keep these basic supplies nearby:
- Garden hose with a standard spray nozzle
- Clean bucket
- Cool or lukewarm water
- Manufacturer-approved mild soap or cleaner
- Soft sponge or microfiber cloth
- Soft-bristle brush, if your cover allows one
- Clean broom for loose debris
- Large clean area for drying and folding
- RV cover repair patches, if needed
- Original storage bag or another suitable container
Avoid reaching automatically for bleach, heavy degreasers, solvents, or stiff brushes. RV cover materials vary, so the cleaner that works safely on one cover may harm another.
Should You Clean an RV Cover While It Is on the RV or After Removing It?
You can often clean an RV cover while it is still installed, and I usually find this easier. The RV supports the fabric, keeps most of it off the ground, and allows water to run downward while you rinse.
Cleaning it while installed also makes dirty areas easier to see. You can work around the roof section, side panels, seams, and lower edges without wrestling with a large pile of wet fabric.
However, removing the cover may make more sense when the underside is dirty. It also helps when you need to inspect hidden seams, repair damage, or clean both sides thoroughly.
The safest approach is simple. Follow your cover manufacturer’s care instructions first, then choose whichever setup lets you clean the fabric gently without dragging it across dirty pavement or damaging the RV.
How to Clean an RV Cover Before Storage
A good cleaning routine is more about being thorough than aggressive. You want to remove contaminants without wearing down the fabric, seams, or protective surface.
Check the Care Label First
Before mixing soap or grabbing a brush, check the sewn-in care label. If you still have the manual or storage instructions, look there too.
RV covers may use polyester, polypropylene, Olefin, multilayer fabrics, or specialized coatings. Those materials do not always tolerate the same cleaners.
One manufacturer may approve mild soap while another may recommend water-only cleaning for routine dirt. That is why I would never assume a household cleaner is safe without checking first.
Remove Leaves, Dust, and Loose Debris
Start by removing everything that can come off dry.
Use your hands, a soft broom, or gentle shaking to clear:
- Leaves
- Pine needles
- Dry mud
- Dust
- Pollen
- Small twigs
- Roof debris
Pay extra attention around seams, zipper flaps, roof sections, buckles, and strap attachment points.
Removing grit first matters because rubbing gritty dirt into wet fabric can create unnecessary abrasion.
Rinse the Cover With a Garden Hose
Once the loose debris is gone, rinse the cover with regular garden-hose pressure.
If the cover is still installed, begin near the top and work downward. This helps carry dirt away instead of pushing dirty water across areas you already cleaned.
You do not need a powerful stream. The goal is to loosen surface dirt, not force water through seams or stress the fabric.
Spend extra time around areas where grime collects, including lower side panels and roof edges.
Spot-Clean Dirty Areas
For stubborn dirt, use the cleaner approved for your cover.
Mix it according to the instructions, then apply it with a soft sponge, cloth, or approved soft-bristle brush.
Work on one small section at a time.
Gently loosen the stain rather than scrubbing hard. If the dirt does not come off immediately, let the approved cleaning solution soften it before trying again.
Try not to let soap dry on the fabric. Washing during cooler parts of the day can make this easier.
Clean the Zippers, Straps, Buckles, and Seams
These areas are easy to forget, but they often collect the most dirt.
Look closely around:
- Zipper teeth
- Zipper flaps
- Buckles
- Strap loops
- Elastic hems
- Reinforced corners
- Sewn seams
Use a damp soft cloth to remove dirt from zipper areas. Do not pull aggressively on a dirty zipper because packed grit can make it bind.
Wipe plastic buckles and straps as well. Dirt left around moving hardware can make the next installation more frustrating.
Rinse Until All Cleaner Is Gone
Do not stop rinsing as soon as the visible suds disappear.
Soap can stay trapped around seams, reinforced panels, hems, and overlapping fabric.
Move methodically from top to bottom. Check areas where water naturally pools or folds over itself.
The cover should feel clean without a slippery or soapy film when you finish.
How Should You Clean Different RV Cover Stains?
Different contaminants behave differently, so using the same cleaning method for everything can make the job harder. Start gently, then follow your cover manufacturer’s stain guidance when ordinary washing is not enough.
| Contaminant | First Approach | What to Avoid |
| Dust and pollen | Rinse and wipe gently | Aggressive dry scrubbing |
| Mud | Let it soften, then rinse and wash | Grinding dry grit into fabric |
| Bird droppings | Soak with water before gently cleaning | Scraping hardened residue |
| Tree sap | Use manufacturer-approved spot treatment | Strong solvents without checking compatibility |
| Mold or mildew spots | Follow material-specific cleaning instructions | Folding the cover away untreated |
| Greasy marks | Use only an approved fabric cleaner | Automotive degreasers |
| Soap residue | Rinse thoroughly with clean water | Adding more cleaner |
Tree sap deserves special care. I would not automatically use alcohol, acetone, gasoline, or similar solvents because they may weaken coatings or discolor the fabric.
The same goes for mildew cleaners. Some materials tolerate certain treatments, while others do not. The care label should guide you.
How Do You Dry an RV Cover Completely Before Storage?
Drying is the step I would take most seriously. A cover can feel dry on top while still holding moisture inside seams, folded hems, reinforced panels, or the underside.
Let the Cover Air-Dry Naturally
Air drying is usually the safest method.
If the cover remains on the RV, leave it installed until the exposed surface feels completely dry. Good airflow makes a noticeable difference.
If you remove it, spread it somewhere clean and dry.
Good options may include:
- A clean driveway
- A dry garage
- A clean patio
- A large dry lawn area
- A clothesline-style setup strong enough for the weight
Be careful with grass. If the ground is damp, it can transfer moisture straight back into the cover.
Avoid placing the cover over dirty pavement if possible. You do not want to finish washing it only to pick up oil, dust, or grit again.
Dry the Inside of the Cover Too
This is the part many RV owners miss.
The outside may be dry while the interior side still feels damp. Moisture can hide wherever the fabric overlaps or touches the RV.
After the outside dries, check the inside.
If necessary, turn the cover over, reposition it, or hang sections separately so air can reach both sides.
Do not assume the inside dried simply because the sun was shining.
Pay Extra Attention to Seams and Reinforced Areas
Thicker parts of the cover usually dry more slowly.
Check:
- Roof panels
- Reinforced corners
- Zipper flaps
- Elastic hems
- Sewn seams
- Strap attachment areas
- Multi-layer sections
Press these areas gently between your fingers.
If they feel cool, heavy, or clammy compared with the surrounding material, they probably need more drying time.
How Can You Tell When an RV Cover Is Fully Dry?
Do a final hand-check before folding.
Feel both sides of the fabric.
Then check:
- Under zipper flaps
- Inside elastic hems
- Around thick seams
- Beneath reinforced panels
- Around corners
- Between overlapping sections
The entire cover should feel consistently dry.
If one area feels noticeably cooler or slightly damp, leave it out longer. I would rather give it extra drying time than discover mildew months later.
How Long Does an RV Cover Take to Air-Dry?
There is no reliable single drying time for every RV cover.
Drying speed depends on:
- Fabric thickness
- Outside temperature
- Humidity
- Wind
- Sun exposure
- How wet the cover became
- Whether it is hanging or lying flat
- The number of reinforced sections
A lightweight cover on a warm, breezy afternoon may dry quickly. A thick multilayer cover in humid conditions can take much longer.
Use the fabric itself as your guide instead of relying on a fixed number of hours.
If the weather turns humid or cool, bring the cover into a dry, ventilated space rather than folding it early.
Inspect the RV Cover Before You Store It
A clean, dry cover gives you the perfect chance to inspect damage. I recommend doing this now instead of discovering problems when you need the cover again.
Look for Tears and Thin Spots
Check areas that experience the most rubbing.
These often include:
- Roof corners
- Ladder contact areas
- Gutter spouts
- Awning corners
- Antenna areas
- Sharp body edges
- Lower corners
Look for thinning fabric as well as obvious holes.
A weak patch may become a full tear during the next windy season.
Inspect Seams and Zippers
Follow the seams around the cover with your eyes and hands.
Watch for:
- Loose stitching
- Separating seams
- Frayed thread
- Bent zipper teeth
- Damaged zipper pulls
- Torn zipper panels
Try each zipper gently once the cover is clean and dry.
If one feels stiff, deal with the problem before storage rather than forcing it during your next installation.
Check Straps, Buckles, and Elastic Hems
Straps keep the cover secure, so damaged hardware deserves attention.
Look for:
- Fraying
- Cuts
- Loose stitching
- Cracked buckles
- Stretched elastic
- Damaged strap loops
Replace or repair anything that looks unreliable.
Repair Small Damage Before Storage
A small tear is usually easier to handle now than later.
If your cover came with repair patches, follow the supplied instructions. Some repairs require a clean, dry surface before the patch will bond properly.
Do not pack the cover away while telling yourself you will remember the damage next season. That is exactly when small problems get forgotten.
How Do You Fold an RV Cover for Storage?
Folding a large RV cover becomes much easier when you use a consistent method. The main goal is to keep the fabric clean, manageable, and free from trapped moisture.
Start on a Clean, Dry Surface
Do not fold your freshly cleaned cover on wet grass, a dusty driveway, or an oily garage floor.
Use a tarp if necessary.
Before you start, check the surface with your hand. It should feel completely dry.
Bring the Side Panels Toward the Center
Spread the cover as flat as practical.
Fold each side toward the middle so the cover becomes a long, narrower strip.
Keeping the folds straight helps prevent straps, zipper sections, and side panels from becoming tangled.
You do not need perfect showroom folds. You just want an organized bundle that will be easy to unfold later.
Fold or Roll Without Forcing the Fabric
Once the cover is narrowed, either fold it into manageable sections or roll it loosely.
Follow the manufacturer’s folding directions when available.
Avoid crushing thick zipper sections, forcing stiff reinforced panels, or creating extremely sharp folds.
A controlled fold or roll is better than stuffing the fabric randomly into a bag.
Keep Straps and Buckles Inside the Fold
Tuck loose straps inward as you go.
This helps prevent them from:
- Tangling
- Catching on shelving
- Scratching nearby equipment
- Pulling on stitched attachment points
- Snagging the cover itself
Keep buckles protected inside the bundle whenever possible.
Where Should You Store an RV Cover?
Where you store the cover matters almost as much as how you clean it. The best storage location protects it from moisture, heat, sunlight, pests, and sharp objects.
Choose a place that is:
- Cool
- Dry
- Sheltered from direct sunlight
- Away from standing water
- Raised above damp floors
- Protected from rodents
- Protected from insects
- Away from chemicals
- Away from sharp tools or equipment
Use the original storage bag if you still have it.
A clean storage bag keeps the folded cover organized and protects it from garage dust.
Just remember that the bag is not a moisture solution. A storage bag cannot make a damp cover safe to store.
Common RV Cover Cleaning and Storage Mistakes
Most RV cover problems after storage come from small shortcuts. Knowing these mistakes makes them easy to avoid.
Putting the Cover Away Slightly Damp
This is probably the biggest mistake.
Even a small amount of trapped moisture can create a musty smell and encourage mildew during long storage.
Do not rely only on the outside surface. Check seams, hems, the underside, and reinforced sections.
Using Bleach or Strong Household Cleaners
A strong cleaner may remove the stain while damaging the material underneath.
Protective coatings can be sensitive to harsh chemicals.
Always start with the mildest approved cleaning method.
Using a Pressure Washer
A pressure washer can concentrate more force than an RV cover needs.
That pressure may stress seams, coatings, or aging fabric.
A garden hose provides plenty of water for normal cleaning without unnecessary force.
Machine-Washing a Cover Without Manufacturer Approval
RV covers are large, heavy, and often multilayered.
Many manufacturers recommend hand washing or hose cleaning instead of putting them through a washing machine.
Follow your specific cover instructions rather than assuming a large commercial washer makes the process safe.
Folding the Cover on Wet Grass
This can undo all your drying work within minutes.
Moisture transfers from the lawn back into the underside of the fabric.
If grass is your only option, wait until it is completely dry or put down a clean waterproof barrier.
Stuffing the Cover Into Its Storage Bag
Stuffing saves a few minutes now but creates more problems later.
Hardware can become tangled, folds become uneven, and damp areas can get buried deep inside the bundle.
A controlled fold makes the next installation easier too.
Storing It Without Checking for Tears
Cleaning is the easiest time to spot wear.
If you skip the inspection, a damaged area may remain hidden for months.
Fixing small issues before storage keeps the cover ready for the next season.
Should You Clean an RV Cover Every Time You Store It?
You should at least inspect and remove loose dirt before every long storage period.
A complete wash makes sense when the cover has been exposed to outdoor dirt, pollen, mud, bird droppings, tree sap, road grime, or other contaminants.
If you used the cover briefly and it stayed clean, a full soap wash may not always be necessary.
The important part is that you do not store contamination long-term.
Organic material and grime become harder to remove after sitting for months.
Can You Store an RV Cover in a Plastic Tote?
Yes, a clean plastic tote can work well once the cover is completely dry.
A tote can help protect the cover from:
- Dust
- Rodents
- Insects
- Garage grime
- Accidental spills
Choose one large enough that you do not have to force the cover inside.
Do not seal a cover in a plastic tote if you have any doubt about moisture. A closed container can trap that moisture for a long time.
A Simple Pre-Storage RV Cover Checklist
Use this quick check before you put the cover away for the season.
- Care label checked
- Loose debris removed
- Cover washed where necessary
- Cleaner completely rinsed away
- Outer surface fully dry
- Inner surface fully dry
- Seams and hems dry
- Zippers checked
- Straps inspected
- Buckles inspected
- Small tears repaired
- Cover folded or rolled neatly
- Storage bag clean and dry
- Storage area cool and dry
- Cover protected from rodents and insects
Final Words
Cleaning an RV cover before storage is not difficult, but rushing the drying process can undo all your work.
Wash it gently, rinse it thoroughly, and give both sides enough time to dry. Then inspect the fabric and hardware before folding it neatly.
If you remember one thing, make it this: never store an RV cover until every seam, hem, panel, and fold feels completely dry.
Related FAQs
Can You Wash an RV Cover With a Garden Hose?
Yes. A regular garden hose is usually the easiest way to remove dirt and rinse soap from an RV cover. Use normal water pressure and follow your cover manufacturer’s care instructions.
Can You Put an RV Cover in a Washing Machine?
Usually, you should not machine-wash an RV cover unless the manufacturer specifically allows it. Large covers can be damaged by agitation, heat, or the weight of wet fabric.
Can You Use Dawn Dish Soap on an RV Cover?
Do not assume dish soap is safe for every RV cover. Check the manufacturer’s cleaning instructions first because some fabrics and coatings require a specific mild soap or cleaner.
Can You Pressure-Wash an RV Cover?
A pressure washer is generally unnecessary and may put excessive force on seams, fabric, and protective coatings. A garden hose with normal pressure is the safer choice for most covers.
Can You Fold an RV Cover While It Is Damp?
No. Folding a damp RV cover can trap moisture deep inside the fabric. That moisture may create mildew, odors, staining, or deterioration while the cover sits in storage.
How Do You Prevent Mold on an RV Cover During Storage?
Clean the cover before storage, air-dry both sides completely, check thick seams for hidden moisture, and store the folded cover somewhere cool and dry.
Should You Store an RV Cover in Its Original Bag?
Yes, the original storage bag is usually a convenient option once the cover is clean and completely dry. Make sure the bag itself is dry before packing the cover.
How Do You Get Tree Sap Off an RV Cover?
Start by checking your manufacturer’s stain-cleaning instructions. Soften the sap gently and use only an approved cleaner rather than reaching for strong solvents that may damage the fabric.
Should You Clean Both Sides of an RV Cover?
You should inspect both sides every time. Clean the inside whenever you find dirt, mildew, grit, stains, or other contamination, and make sure both surfaces are fully dry before storage.

Jack Collins specializes in RV routes, trail access, and travel logistics. His how-to articles help RV and trailer owners plan smoother trips and avoid common mistakes. Every review focuses on performance, safety, and value.